 EN
EN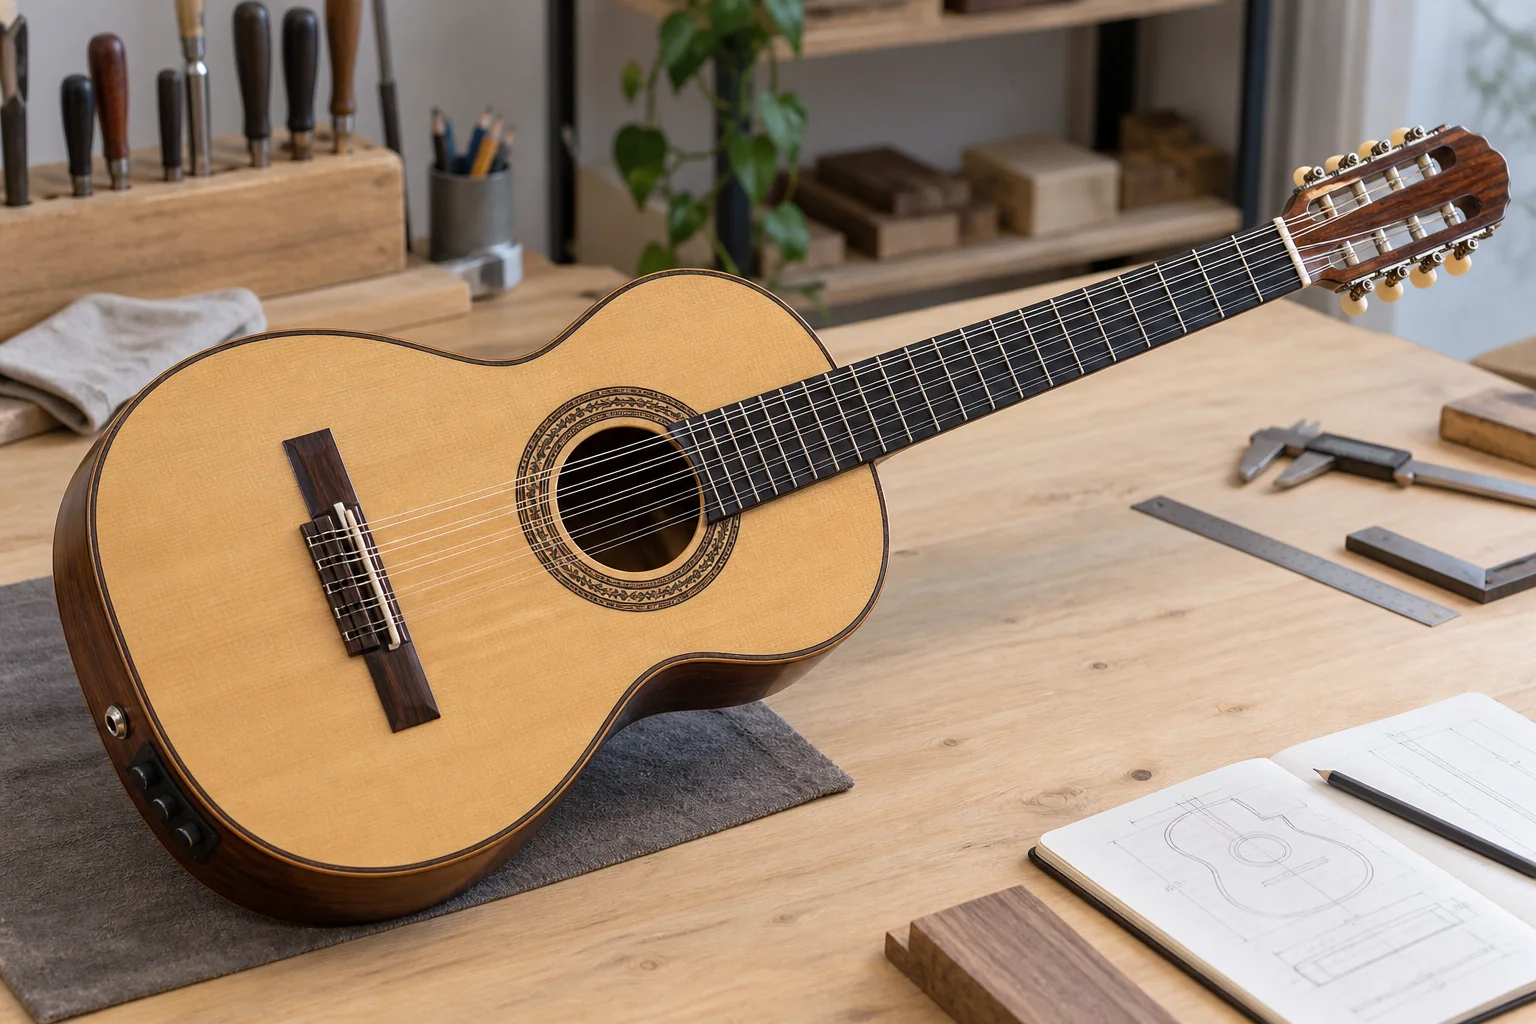
An electric viola caipira brief needs to define two products at the same time: the acoustic instrument and the amplified system fitted to it. If the body, neck, tuning and setup are approved without the electronics, the factory has only completed half of the product. If the pickup is chosen first and the acoustic construction is treated as secondary, the sample may work through an amplifier but feel wrong to the player.
Retail buyers often begin with a short request such as “ten-string electric viola” or “viola caipira elétrica with EQ.” That is enough to open a conversation. It is not enough to quote, sample or write an accurate product page. The pickup type, control layout, battery access, output jack and functional checks all need to be connected to the intended player, tuning and body platform.
This guide explains how an importer, distributor or retailer can turn that initial request into a sample that is practical to approve and practical to sell.
In brief: confirm the destination market, player, tuning and paired-course layout first. Then define whether the model is passive or active, where the pickup and controls are installed, how the output and battery are accessed, and which acoustic, setup and amplified checks will be used for approval. Treat the cable, instructions and packaging as part of the finished retail product.
Begin with the intended market and player
Viola caipira is closely connected with Brazilian musical traditions, but a retail range can serve very different customers. One model may be aimed at experienced regional players. Another may be a broadly accessible electro-acoustic instrument for learners or stage performers. Those customers may expect different body proportions, neck feel, tuning information, electronics and price position.
The first section of the brief should state:
- Destination country and sales channel.
- Intended player level and main musical use.
- Regional tuning or buyer-approved setup reference.
- Traditional acoustic use, amplified stage use, recording, education or a mixed role.
- Expected place in the retailer's assortment.
- Reference instruments or features.
- Estimated quantity by model and finish.
- Branding, documentation and packaging direction.
Do not ask the factory to infer the market from the Portuguese product name alone. A production team needs a controlled specification, while the retailer needs a product story that local players recognise. The buyer connects those two needs.
Our Viola Caipira buying guide covers the broader product decisions that should be settled before sampling. The present article focuses on the additional work created by an amplified model.
Define the acoustic instrument before adding electronics
The pickup does not replace the need for a complete instrument specification. Confirm the body, neck and setup on their own terms.
Body and construction
Record the body outline, depth, scale, neck joint, soundhole, top, back and side construction, bridge, binding, rosette and finish. Use accurate terms for solid, laminated or other construction. If a wood species is required, confirm availability and acceptable visual variation rather than relying on a colour photograph.
The body also has to accept any required routing, battery box, side preamp or output jack without weakening the planned construction. These locations should be shown on a drawing or annotated sample photograph before cutting begins.
Ten strings and five courses
A common viola caipira arrangement uses ten strings in five paired courses, but the project should state the actual string and course layout. Record the intended tuning or buyer-approved reference, the installed string set or gauge direction, and any market-specific instructions.
String layout affects nut slots, bridge spacing, tension, setup and intonation. If the tuning changes after the electronics and bridge have been selected, the sample may need more than a simple restring.
Neck, nut and playing feel
Specify scale, fret count, nut width, course spacing, fingerboard dimensions, neck profile and finish feel. Review fret ends, level, action, neck relief and outside-string margin on the physical sample.
Words such as comfortable or slim are not approval standards. Use measurements at agreed positions and, where practical, a buyer-approved reference instrument. The final decision can still include playing judgement; it should not depend on judgement alone.
Choose passive or active electronics deliberately
“Electric” can describe several approaches. A buyer may want a passive pickup with no onboard battery, an active preamp with volume and tone controls, or another system approved for the project. Each choice changes the bill of materials, installation, user instructions and inspection.
Passive systems
A passive system can offer a simpler control layout and avoid battery management. The buyer still needs to confirm pickup type, output level expectations, jack position, cable compatibility and the signal path used during testing. A passive output may behave differently with different amplifiers or interfaces, so sample approval should use equipment relevant to the target customer.
Active preamps
An active system adds onboard controls and a power source. Specify:
- Control functions and order.
- Whether a tuner or other feature is included.
- Battery type and battery-box location.
- Access method for battery replacement.
- Whether a battery ships with the product and any transport or labelling implications the buyer must review.
- Output-jack design and switching behaviour.
- Expected indicator behaviour if the system uses one.
Do not approve an active system only by checking that sound comes out. The player will handle the controls, change the battery and connect the instrument repeatedly. Those actions are part of the product experience.
Place controls where they can be used and serviced
Control placement should balance access, appearance, construction and packaging. A large side panel may be easy to operate but visually unsuitable for a traditional-looking model. A hidden control can preserve appearance but become difficult to adjust on stage.
Before sampling, review:
- The player's reach in normal playing position.
- Clearance from internal support and body edges.
- Routing and fastening method.
- Risk of cable or component contact inside the body.
- Battery access without removing unrelated parts.
- Whether the panel or jack changes carton support or case fit.
- Availability of replacement components.
Use a drawing that identifies the control panel, pickup, output jack and battery box. A photograph of another model is helpful context, but it does not establish dimensions or internal clearance.
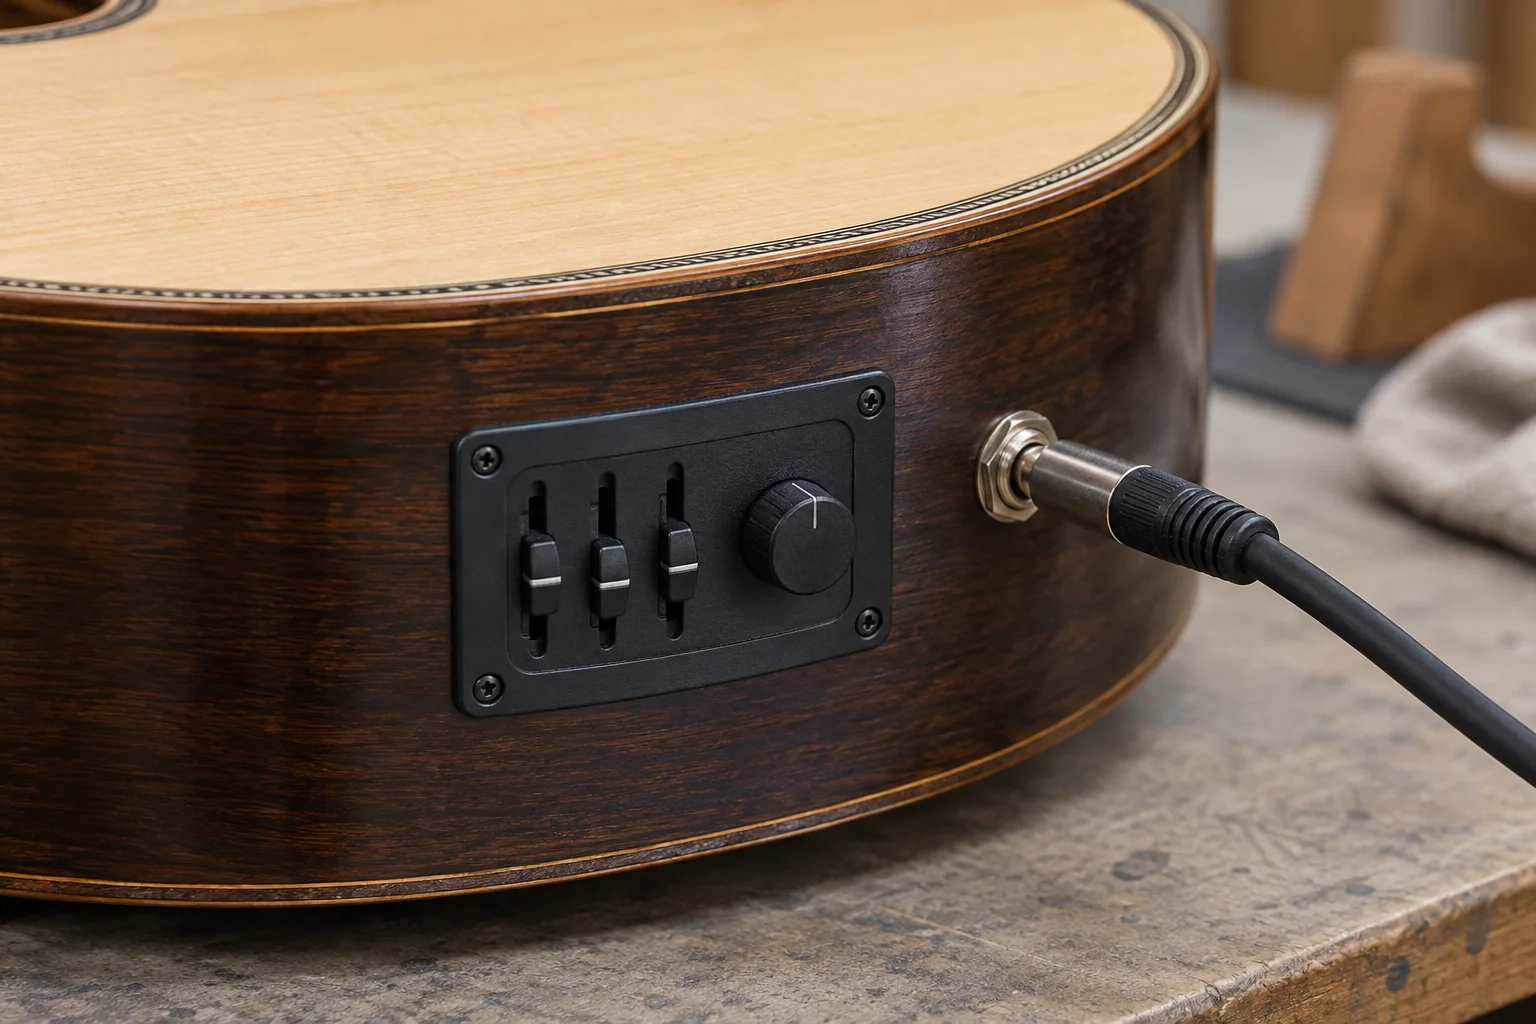
Illustrative visual: side-mounted preamp and output details that should be confirmed before sample approval.
The output jack deserves specific attention. Confirm its location, fastening, strain resistance and interaction with a strap if one is used. During sample review, connect and disconnect a normal cable several times and check that the hardware remains secure.
Preparing an electric viola caipira brief? Send the intended market, tuning, pickup or preamp direction, control layout, estimated quantity, branding and packaging through the Vinesmusical Contact page. We can identify which points are ready for quotation and which require technical review.
Match the pickup to the bridge and acoustic design
Pickup choice should be reviewed with the bridge and saddle design, not after them. An under-saddle system, contact pickup or another approach may require different installation and balance checks. The factory should confirm that the selected system is compatible with the approved bridge and acoustic construction.
For a sample, check:
- Secure installation without loose parts or unwanted contact.
- Consistent response across the five courses at normal playing levels.
- No obvious mechanical rattle introduced by the electronics.
- Stable bridge and saddle fit after pickup installation.
- Output that remains usable across the intended player technique.
- Clean cable connection and control operation.
Avoid making tone claims from a component name alone. The same pickup can behave differently depending on installation, bridge contact, setup and the instrument around it. Approve the complete fitted sample.
Create a repeatable functional check
The factory and buyer should agree on a simple, repeatable signal check. It does not need to be a laboratory test unless the product or buyer requires one. It does need to answer more than “working.”
A practical check may cover:
- Visual inspection of pickup, controls, jack and battery access.
- Cable connection with the agreed sample setup.
- Output from every course under consistent playing force.
- Control direction and function in the approved order.
- Unwanted hum, crackle, intermittent signal or loose-jack noise.
- Battery installation and replacement where applicable.
- Handling while the instrument is held in normal playing position.
- A short recheck after normal adjustment and packing preparation.
Record the equipment or signal path used for sample approval. A clean result through one high-impedance input may not predict the same result through every retail amplifier, but it gives the buyer and factory one common reference.
Our Electric Guitar and Bass Electronics QC guide explains the value of checking the complete installed system, control logic and batch sampling. The exact checklist should still be adapted to the viola caipira project.

Illustrative visual: an amplified instrument prepared for functional and setup checks.
Approve acoustic and amplified performance separately
An electro-acoustic model should be reviewed unplugged and amplified. These are related but different checks.
Unplugged review
Confirm tuning, neck relief, action, fret response, bridge stability, unwanted buzzes, general balance and player comfort. Listen for rattles that may come from a cable, battery box or control panel inside the body.
Amplified review
Confirm signal from all courses, control function, usable output, noise behaviour and handling. Move the cable gently at the jack and operate every control several times. If the system includes a tuner, display or indicator, check it under the intended battery condition.
Approval comments
Separate product changes from setup corrections. “The third course is weak,” “the saddle contact is uneven” and “replace the pickup” are not necessarily the same conclusion. Record the observed result first. Then let the buyer and factory agree on the cause and action.
This prevents a component change from being used to solve an installation or setup issue—and prevents a setup adjustment from hiding a genuine component problem.
Plan sample revisions before bulk production
Use one project code and dated revision. Keep body, neck, electronics, finish, branding and packaging comments in one record.
A sensible review sequence is:
- Confirm model identity and current specification.
- Measure critical body, scale, neck and course details.
- Check construction, finish and branding.
- Review unplugged setup and playability.
- Inspect electronics installation.
- Run the agreed amplified functional check.
- Review controls, battery access and cable handling.
- Inspect accessories, instructions and retail packaging.
- List open points, owner and next revision.
If a pickup, preamp or control panel changes, ask whether the routing, battery box, jack, instructions, carton insert or product photos must also change. Electronics revisions often reach further than the component list suggests.
The OEM specification sheet guide can be adapted for a viola caipira model. Before shipment, use an order-specific release plan similar to the one described in our pre-shipment inspection guide.
Packaging and customer information are part of the system
The packed instrument may include a cable, battery, strap button information, adjustment instructions or other approved accessories. Confirm exactly what is included and where it is placed.
Check that:
- The output jack and side control panel do not press against carton supports.
- A loose cable or accessory cannot scratch the finish.
- The neck and headstock are supported without pressure on tuning machines.
- Battery instructions match the fitted system.
- Product labels and online specifications state the correct control functions.
- The retailer receives clear tuning and setup information.
Do not publish a pickup or preamp model until it is confirmed for production. If the buyer allows an approved equivalent, define how changes will be communicated and whether new photos or product copy are required.
Electric viola caipira buyer checklist
Before approving the sample, confirm:
- Target market, player and musical use.
- String count, five-course layout and intended tuning.
- Scale, nut, spacing, neck profile and fretwork.
- Body platform, construction and finish.
- Passive or active electronics direction.
- Pickup, preamp, control, battery and jack locations.
- Bridge and pickup compatibility.
- Unplugged setup and playability.
- Amplified output, course balance, controls and noise behaviour.
- Branding, instructions, accessories and packaging.
- Sample revision and production reference.
Frequently asked questions
Is an electric viola caipira the same as an acoustic model with a pickup?
Not for specification purposes. The electronics can affect the bridge, routing, body side, battery access, output jack, packaging and inspection. Approve the acoustic instrument and the complete amplified system together.
Should a buyer choose a passive or active system?
Choose according to the intended player, stage or recording use, control needs, service expectations and product position. Passive systems can be simpler; active systems can provide onboard controls but add battery and component requirements. Neither is automatically better.
How many strings should the specification show?
A common viola caipira configuration uses ten strings in five paired courses. The buyer should still state the exact layout and tuning required for the model because setup and regional practice matter.
What electronics problems should be checked on a sample?
Check course-to-course response, output, unwanted hum or crackle, control direction, intermittent connections, loose hardware, cable handling and battery access where applicable. Also listen unplugged for rattles introduced by the installed system.
What information should a retailer publish for an electric viola caipira?
Publish confirmed facts about the course layout, tuning, scale, construction, pickup or preamp, controls, battery needs, included accessories and setup. Avoid copying component or material claims from a reference product when they were not approved for production.
Approve the instrument the customer will actually receive
An electric viola caipira is a complete acoustic-electric product. The player does not experience the body, strings, pickup, preamp and packaging as separate purchasing departments. The buyer's specification should connect them in the same way.
Define the player and tuning. Close the body and neck decisions. Place the electronics deliberately, then test the full fitted sample unplugged and amplified. When revisions are made, update the specification, product information and packaging together.
At Vinesmusical, B2B projects are reviewed from the specification and sample through production, inspection and packing. The company was established in 2014 and operates a company-owned factory of approximately 10,000 square metres across five floors. Its 80-person team works with monthly capacity of approximately 7,000 guitars and 13 years of OEM/ODM experience. Buyers carrying out supplier due diligence can also review the company's third-party BSCI certification and independent in-depth factory audit report.
Review our finished-instrument range and send your requirements to discuss an electric viola caipira project. Include the intended market, player, tuning, reference model, electronics direction, estimated quantity, branding and packaging so the technical review begins with a usable brief.